Import Sample Data to a MongoDB Database
By Hemanta Sundaray on 2021-11-15
In this blog post, we will learn how to import sample data to a MongoDB database.
First, create a folder named store on your desktop and open it in Visual Studio Code.
Inside the store folder, create a folder named server.
PS C:\Users\Delhivery\Desktop\store> mkdir serverNext, create a package.json file using the following command:
PS C:\Users\Delhivery\Desktop\store> npm init -yNow, install the following libraries:
PS C:\Users\Delhivery\Desktop\store> npm i express mongoose dotenv nodemonInside the server folder, create a folder named data, and inside the data folder, create a file named products.js.
server/data/products.js
const products = [
  {
    name: "Airpods Pro",
    brand: "Apple",
    category: "Electronics",
    price: 99.99,
  },

  {
    name: "Canon 80D DSLR Camera",
    brand: "Cannon",
    category: "Electronics",
    price: 1099.0,
  },

  {
    name: "Logitech Gaming Mouse",
    brand: "Logitech",
    category: "Electronics",
    price: 49.99,
  },
];

module.exports = products;
This is the data that we would import to the MongoDB database.
Next, inside the server folder, create a file named index.js.
server/index.js
const express = require("express");
const connectDB = require("./config/db");
const dotenv = require("dotenv");
const Product = require("./models/productModel");

dotenv.config();

connectDB();

const app = express();

app.use(express.json());

app.get("/products", async (req, res) => {
  const products = await Product.find({});
  res.json(products);
});

const PORT = process.env.PORT || 5000;

app.listen(PORT, () => {
  console.log(`Server listening on port ${PORT}`);
});
Inside the server folder, create a folder named models, and inside the models folder, create a file named productModel.js.
server/models/productModel.js
const mongoose = require("mongoose");

const productSchema = new mongoose.Schema({
  name: {
    type: String,
    required: true,
  },
  brand: {
    type: String,
    required: true,
  },
  category: {
    type: String,
    required: true,
  },
  price: {
    type: Number,
    required: true,
  },
});

const Product = mongoose.model("Product", productSchema);

module.exports = Product;
Next, inside the server folder, create a folder named config and inside the config folder, create a file named db.js.
server/config/db.js
const mongoose = require("mongoose");
const dotenv = require("dotenv");

dotenv.config();

const connectDB = async () => {
  try {
    const conn = await mongoose.connect(process.env.MONGO_URI, {
      useNewUrlParser: true,
      useUnifiedTopology: true,
    });

    console.log(`MongoDB connected: ${conn.connection.host}}`);
  } catch (error) {
    console.error(`Error: ${error.message}`);
    process.exit(1);
  }
};

module.exports = connectDB;
Now, create a file named .env inside the store folder.
store/.env
PORT=5000
MONGO_URI=mongodb+srv://sundaray:<password>@sandbox.y8blv.mongodb.net/myFirstDatabase?retryWrites=true&w=majority
Replace <password> with the password that you have set for the database user and replace myFirstDatabase with the name of your database.
Learn how to create a free MongoDB Atlas account and find the connection string in my blog post here and here respectively.
Inside the server folder, create a file named seeder.js.
server/seeder.js
const dotenv = require("dotenv");
const connectDB = require("./config/db");
const Product = require("./models/productModel");
const products = require("./data/products");

dotenv.config();

connectDB();

const importData = async () => {
  try {
    await Product.deleteMany();
    await Product.insertMany(products);

    console.log("Data Imported");
    process.exit();
  } catch (error) {
    console.error(error);
    process.exit(1);
  }
};

const destroyData = async () => {
  try {
    await Product.deleteMany();

    console.log("Data Destroyed");
    process.exit();
  } catch (error) {
    console.error(error);
    process.exit(1);
  }
};

if (process.argv[2] === "-d") {
  destroyData();
} else {
  importData();
}
Add the following scripts in the package.json file.
store/package.json
{
  "name": "store",
  "version": "1.0.0",
  "description": "",
  "main": "index.js",
  "scripts": {
    "server": "nodemon server/index.js",
    "data:import": "node server/seeder.js",
    "data:destroy": "node server/seeder.js -d"
  },
  "keywords": [],
  "author": "",
  "license": "ISC",
  "dependencies": {
    "dotenv": "^10.0.0",
    "express": "^4.17.1",
    "mongoose": "^6.0.12",
    "nodemon": "^2.0.15"
  }
}
Start the server using the following command:
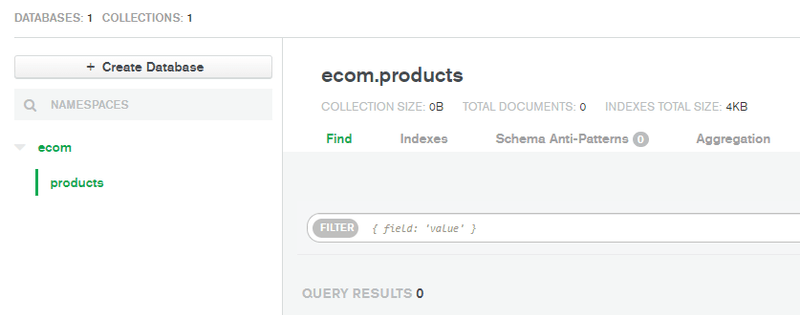
PS C:\Users\Delhivery\Desktop\store> npm run serverYou can see that the products collection in the ecom database is empty.
Create a new terminal and run the following command:
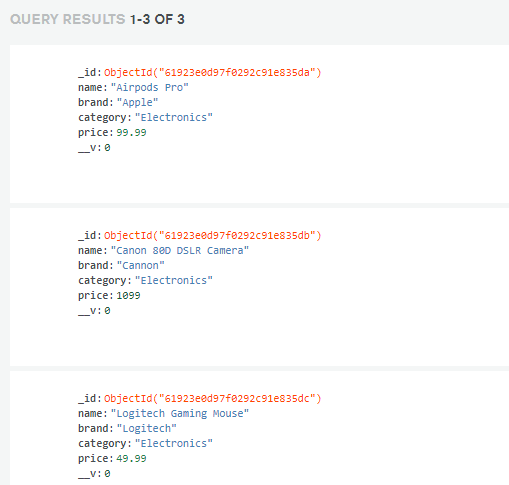
PS C:\Users\Delhivery\Desktop\store> npm run data:importRefresh the ecom database and you will see that the data in the products.js file has been imported.
If you want to delete the data, run the following command:
PS C:\Users\Delhivery\Desktop\store> npm run data:destroyRefresh the ecom database and you will see an empty products collection.
We have already configured a /products route in the index.js file.
Ensure that the data is imported into the ecom database. Next, in a browser tab, visit localhost:5000/products and you will see the product list as shown below:


